It seems like we go from a few extra pounds picked up over the holidays to swimsuit weather overnight. One minute we’re working on plans to lose what we’ve gained, then we’re fully out of time.

Let it be said, developing your core muscles will not make you shredded. That’s more a matter of how you eat, but developing your core will burn calories and make you stronger.
Burning calories can help you shred, but being stronger will help you work longer and harder. The two combined could help you get shredded, but that’s not the goal.
Warning: This is an advanced core workout. If you are just getting into working out, hold off until you can hold a proper plank for 30 seconds.

- No saggy hips. You can pike if you must, but if you have to pike the whole time then you’re probably not ready for this workout.
- Push your hold times and reps. If you never get past 30 seconds, then you will not benefit from improvement.
- Don’t stress if your hold times decrees with each round. There are no breaks once this starts. You WILL fatigue. If you aren’t fatiguing, then you weren’t pushing it hard enough at first.
- Start with three round of these exercises. That is your set. Try to build to five rounds or do more than one set as you get stronger.
- If you are feeling these in your lower back, more than just muscle fatigue, then something is going wrong. Get help.
Here’s the order of exercises for one round:
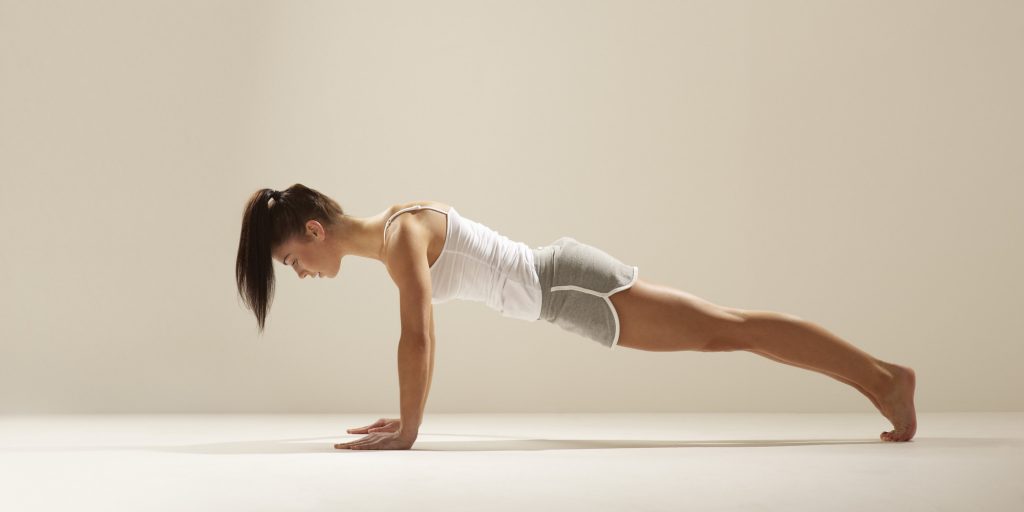
- Prone Plank
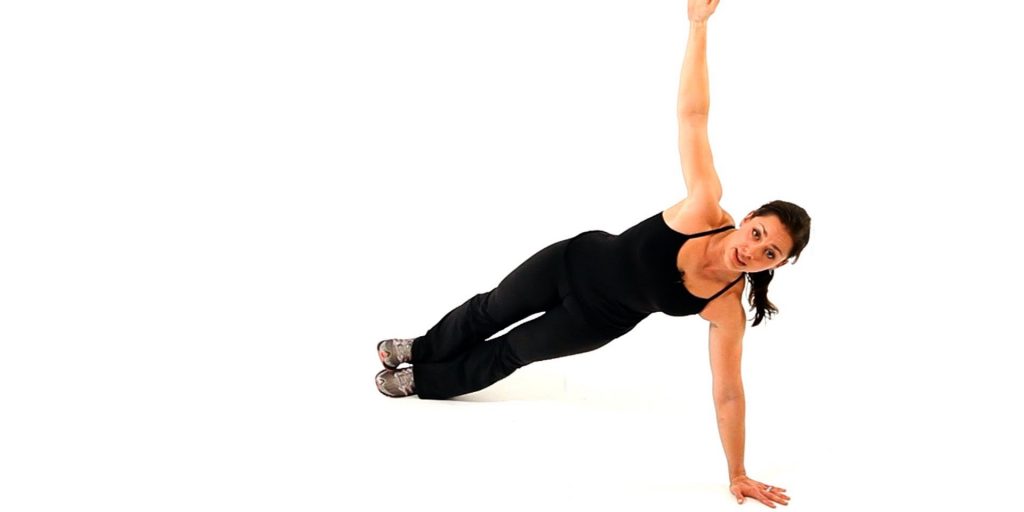
- Side Plank (one side)
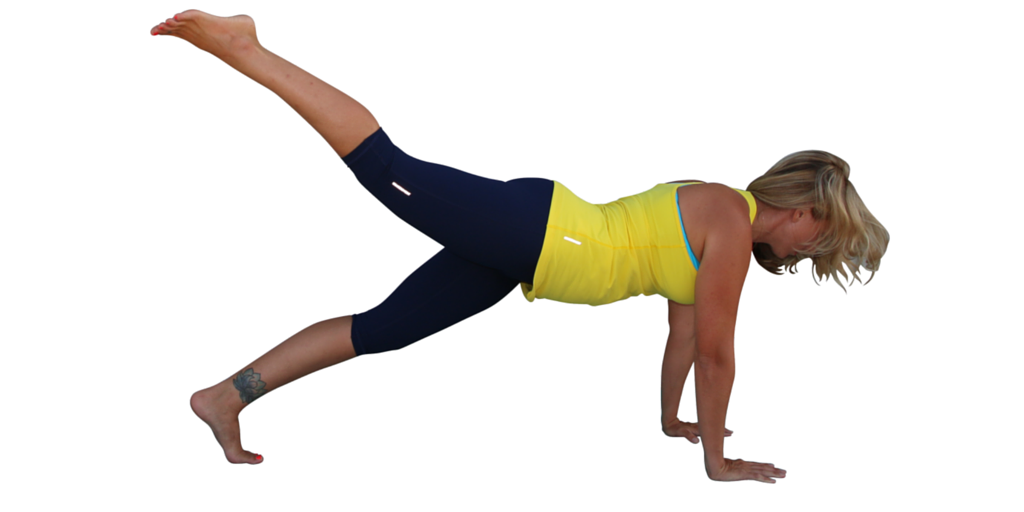
- Plank Extension
- Side Plank (other side)
Prone Plank

The standard for planking is to plank on your elbows. Instead, post up on your hands, since this has a universal application for movement.
Consider, you will generally not open doors with your elbows. We push from our shoulders to our hands. Actually, it’s feet to hands, but we’re just talking upper body right.
- Place your hands no wider than shoulder-width apart.
- Screw your hands into the floor, putting counterclockwise pressure on your left hand, clockwise on your right.
- Your shoulder blades should be flat to your back. Think of tucking them into your back pockets.
- The head should not be craned back, but floating off your shoulders, aligned with your spine.
- From shoulders-to-feet, you should be naturally straight. Your lower back and neck will curve some.
Suck in your belly button. Imagine there is a cable connecting your belly button to your anus.
Shorten that cable to create tension, then hold that pose for at least 30 seconds. If you can do it longer, do so.
Side Planks

The side plank follows many of the same rules in the prone plank, but on your side. Staying aligned is key. If you can use a mirror it helps.
You should be able to draw a straight line from between your eyebrows through your pelvis to between your feet. The line from your arms should cross this line almost perpendicularly.
- Start from your prone plank.
- Rotate onto one arm. If you feel any pain or destabilization, stick with prone planks until your shoulders are strong enough.
- The distance between your shoulder blade and spine will shorten. Your shoulder blades should stay tucked into your back pockets.
- Reach to the sky with your free hand. Hold.
Same as the prone planks, shorten the distance between your belly button and anus. The shoulders should not shrug in any way.
If not, go back to prone planks until you get stronger.
You will come back to this after the plank extensions. Plan to side plank on whatever side you aren’t on the first time through; alternate left to right.
Plank Extensions

These are a prone plank with a kick, literally. The thing to watch out for is your lower back dropping down. Your belly should not lower to the ground at all with these.
- Start from your prone plank.
- Drawing your belly button in as tightly as you can, lift one leg from the heel.
- Your knees should not bend.
- Height is not a goal. Moving your leg mere inches will suffice. Plan to keep movements tight.
- Lift one leg, then lift the other, slow and controlled.
A good reference is to get five lifts per leg for your first set. Try to get twenty total if you can. Everything will be burning by the end. You will welcome the chance to get back into your side plank after a few of these.
As you transition between planks, don’t rest on the floor. You can take a pause in any plank, but don’t relax your tension. You could hurt your shoulders. Instead, shorten your exercises if you are getting too tired.
You can always add more time as you get stronger, even if it means your holding these poses for seconds at first, doing only a few reps. Either way, you’re gonna feel these in the morning.
Last thing: It’s okay to make some noise. In fact, you’re going to. If not, you aren’t trying hard enough.